MGF /TF Wiper Motor/ Wischermotor

Gelenk abgerutscht ? Motor noisy ??
wiper assy ball joint broken + Alternativ Mike Satur Gestänge + Motor Final Repair + MGF EPC

Substitute with VW/Audi/Skoda

Change of P/N, different connector

Two versions of the wiper motor are installed, depending on the make year.
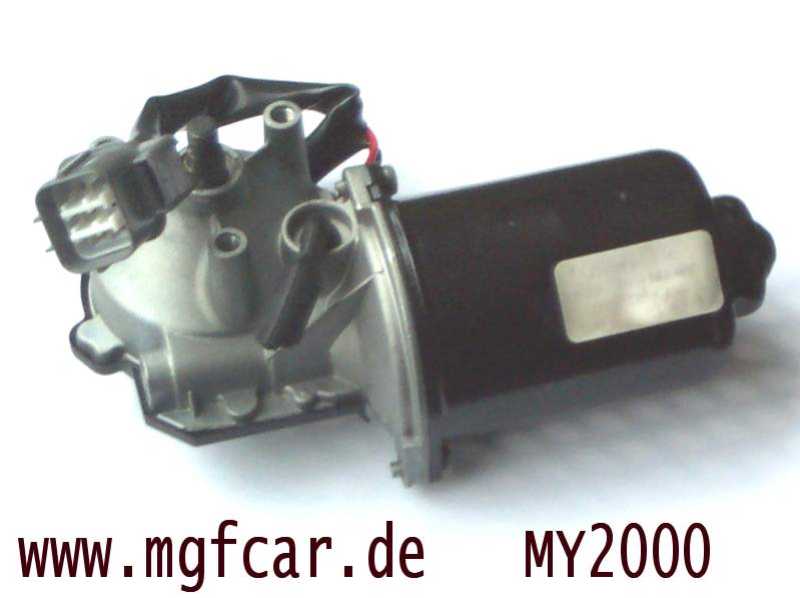
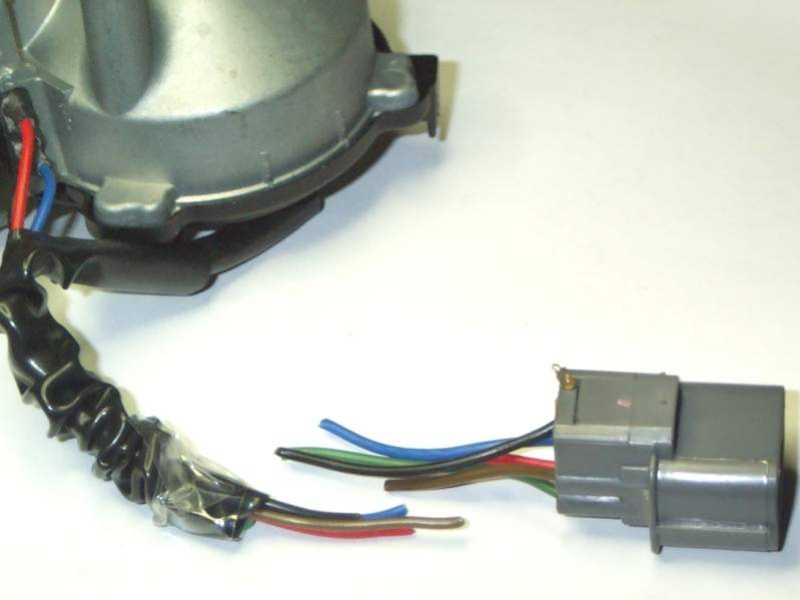
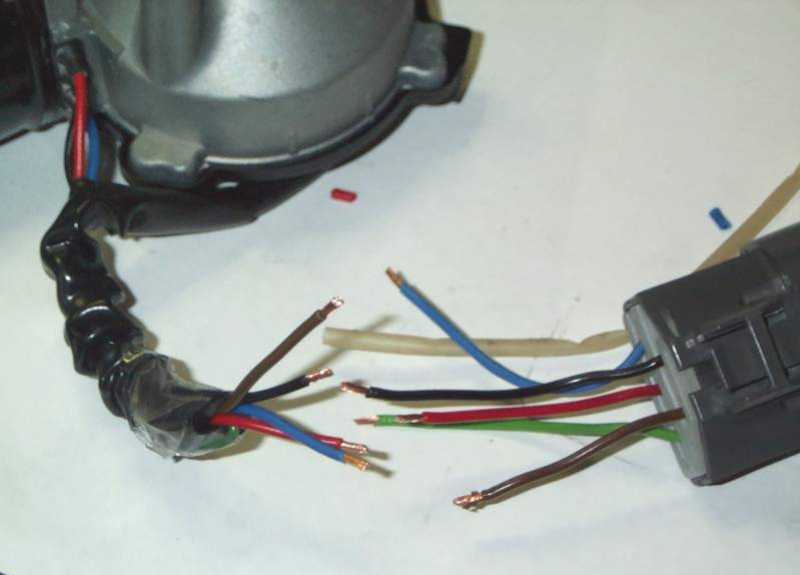
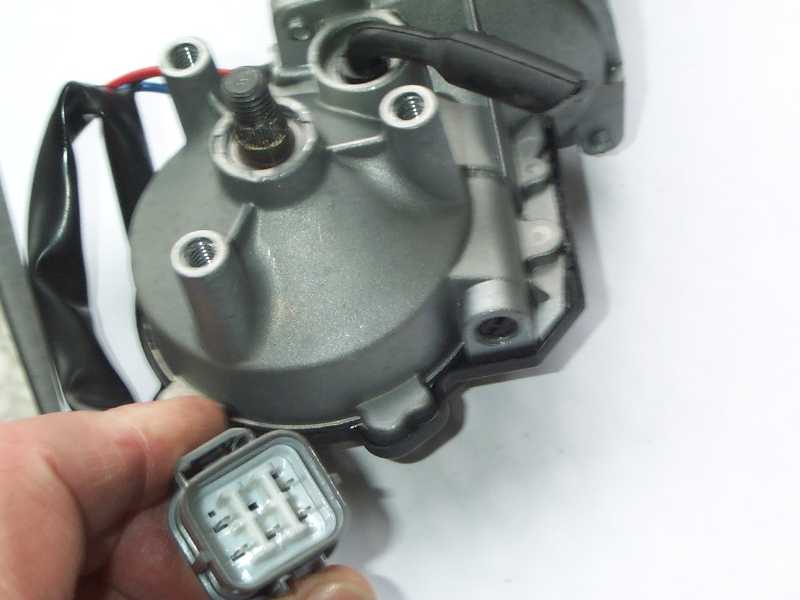
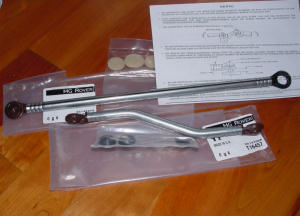
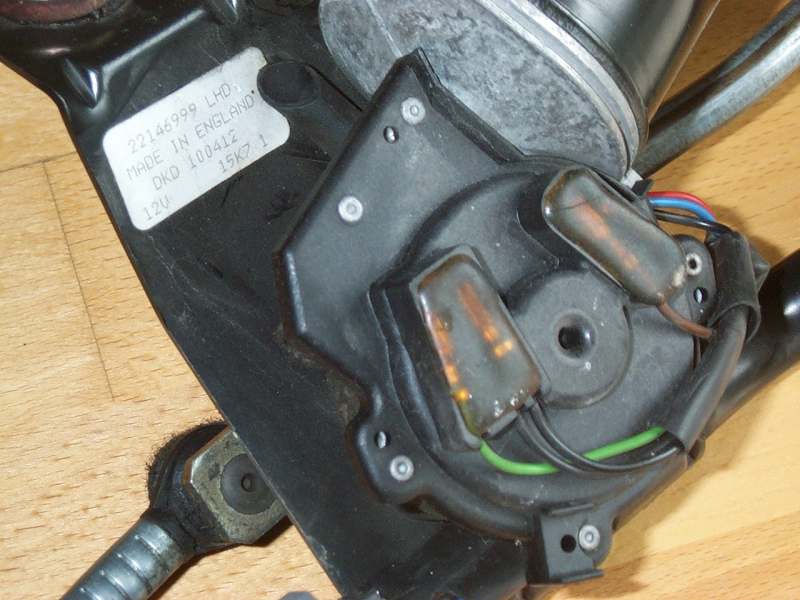
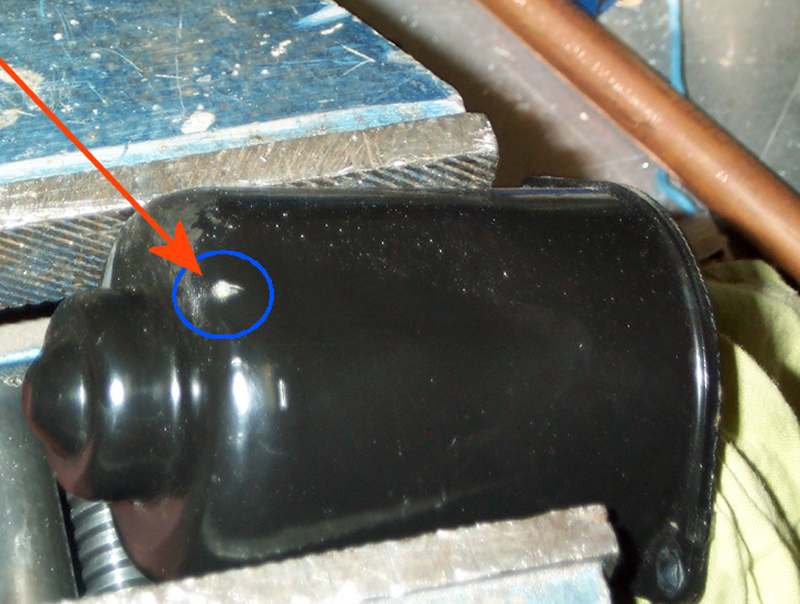
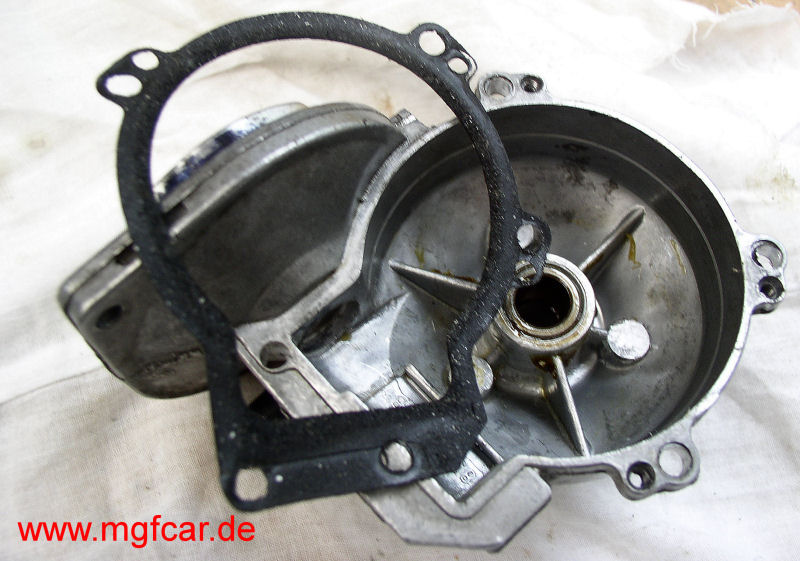
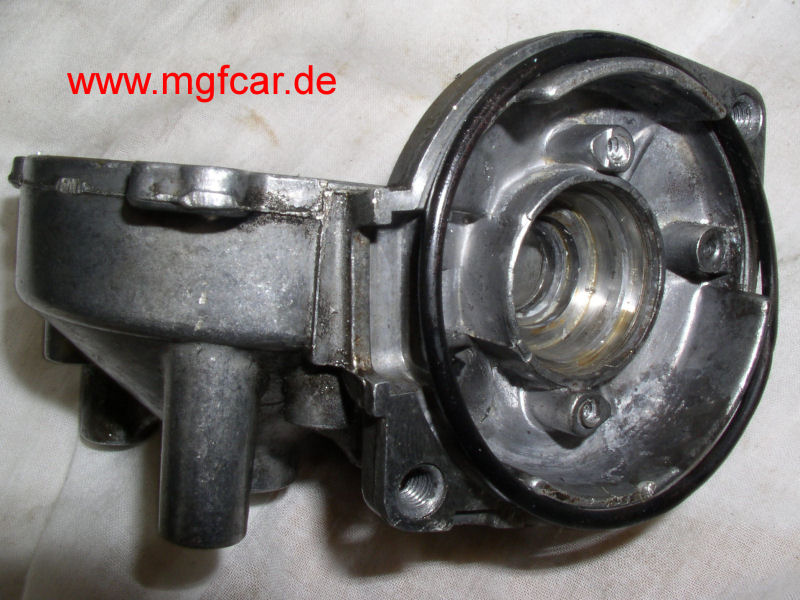
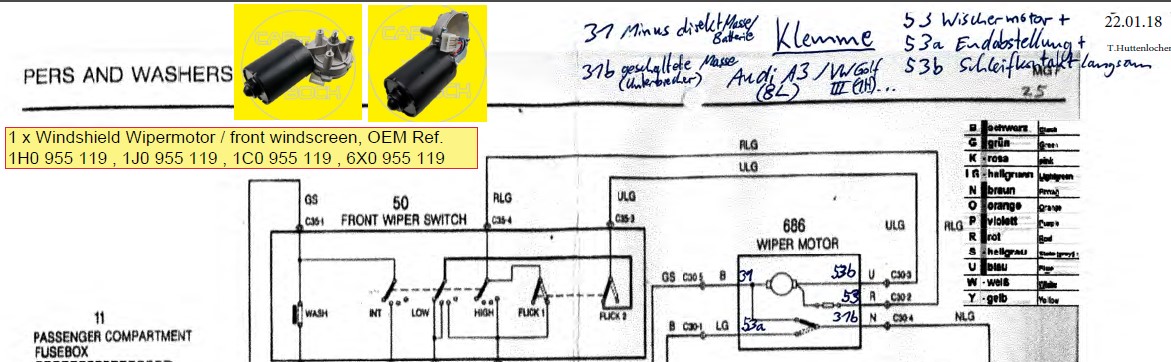
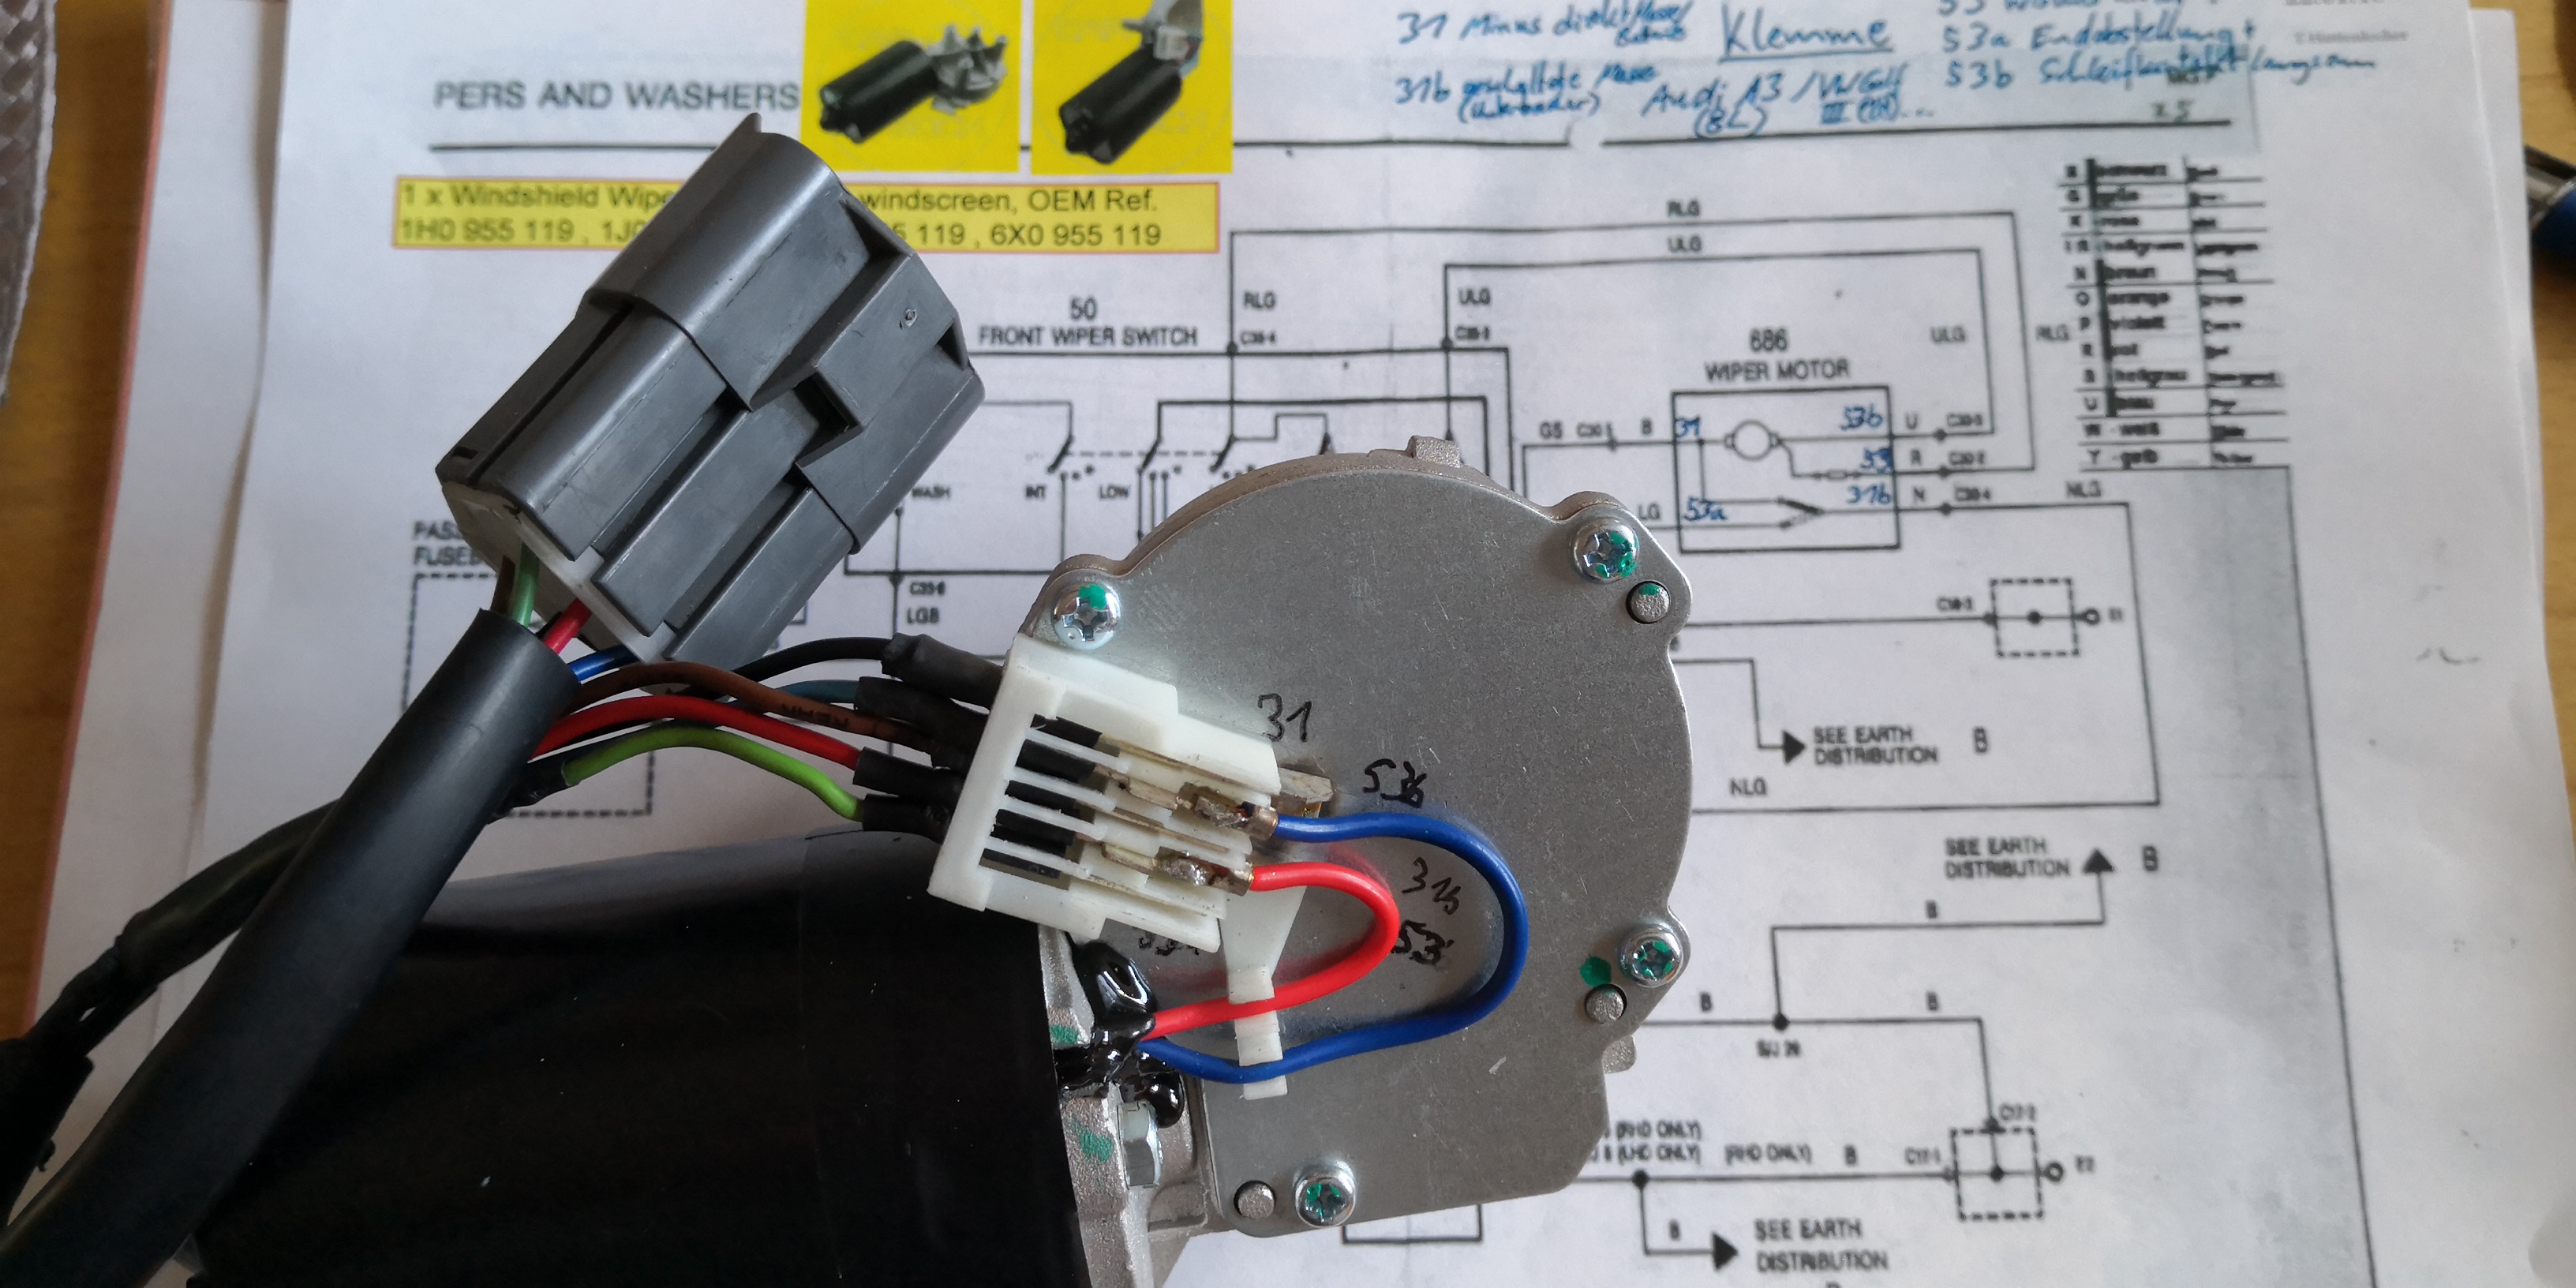
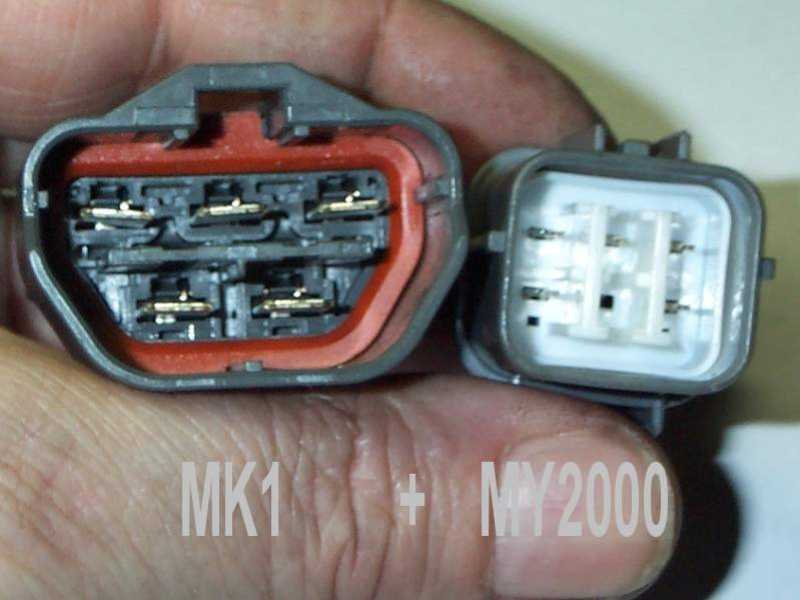
Until MK1 with large connector and 6.3 mm internal spade connectors Part No. DLB000260 @ 197,38€ excl. VAT.
(old P/N: GNU7843)

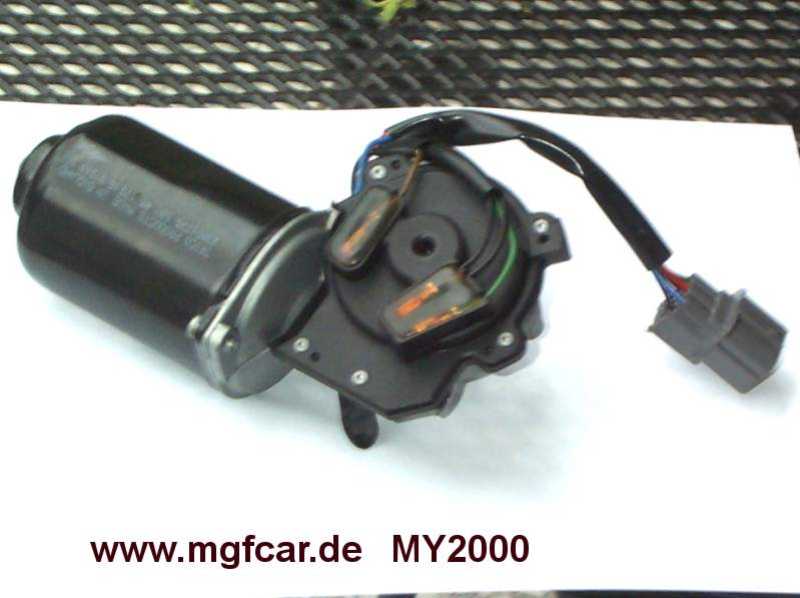
MY2000 upwards with small connector and 2.8mm blades inside, DLB000270.
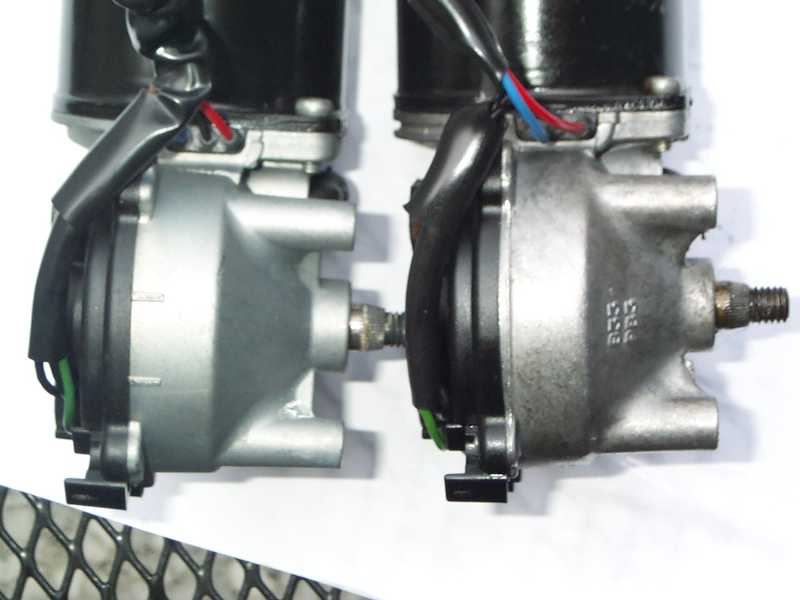
I found no important difference on the other hand,

(MY2000 connector below not on picture, )
How to remove the wiper assy, hint from AJ

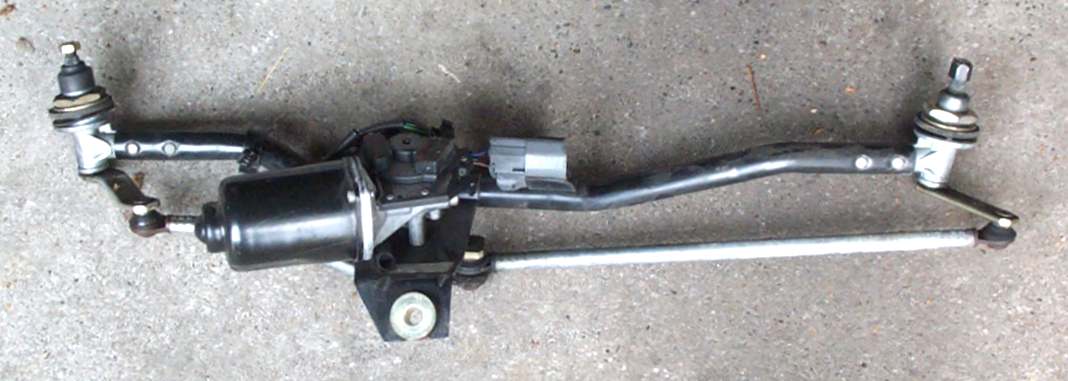
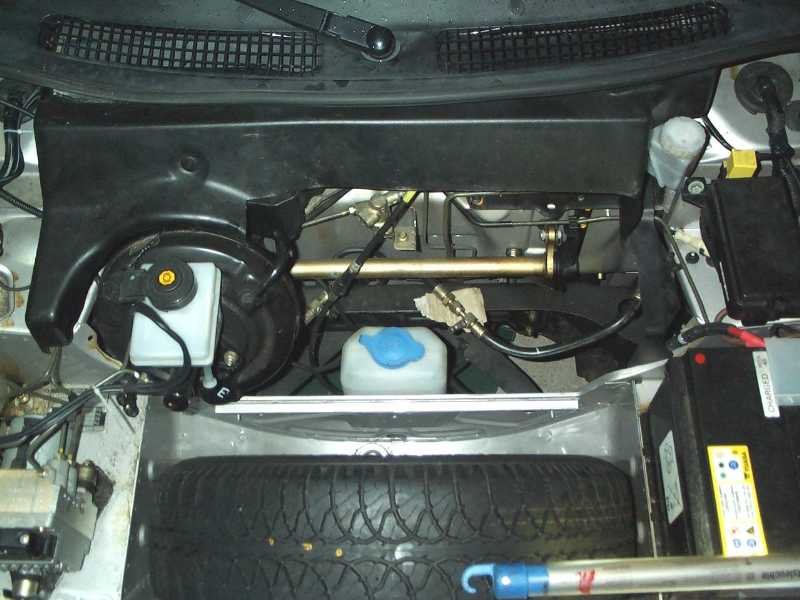
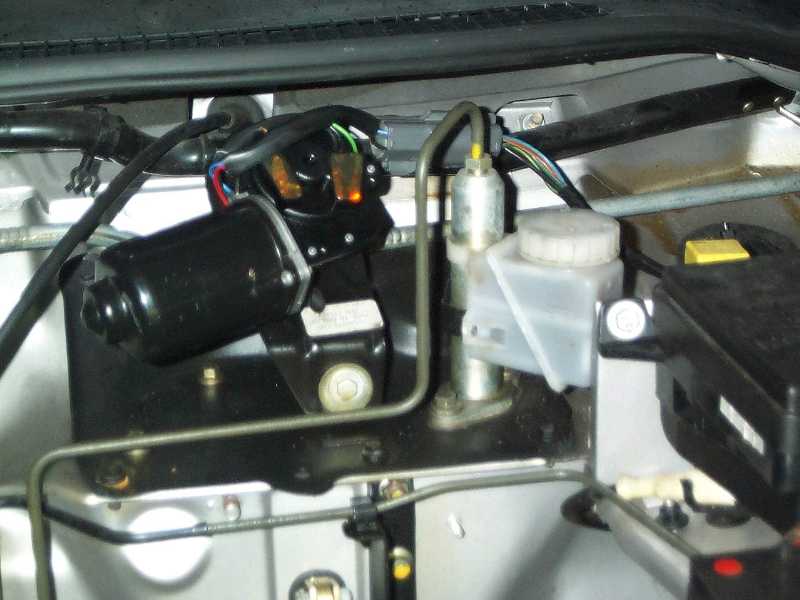
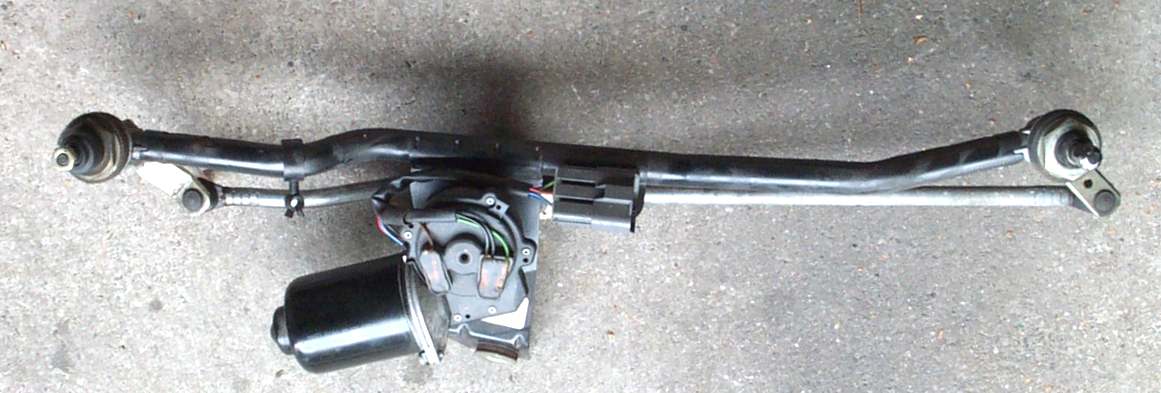
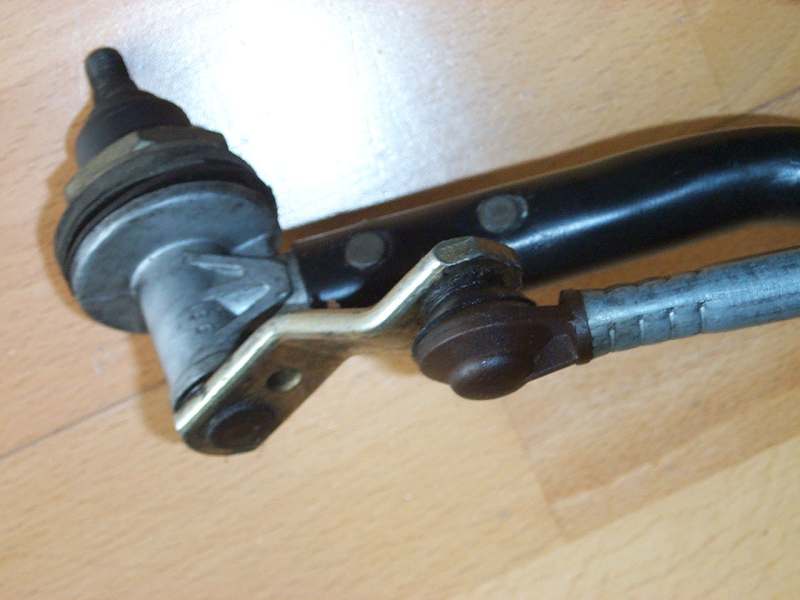
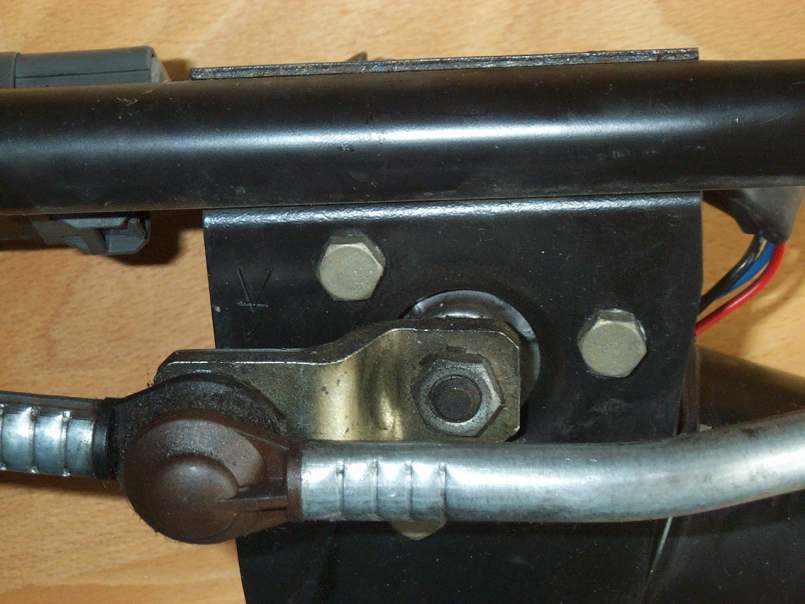
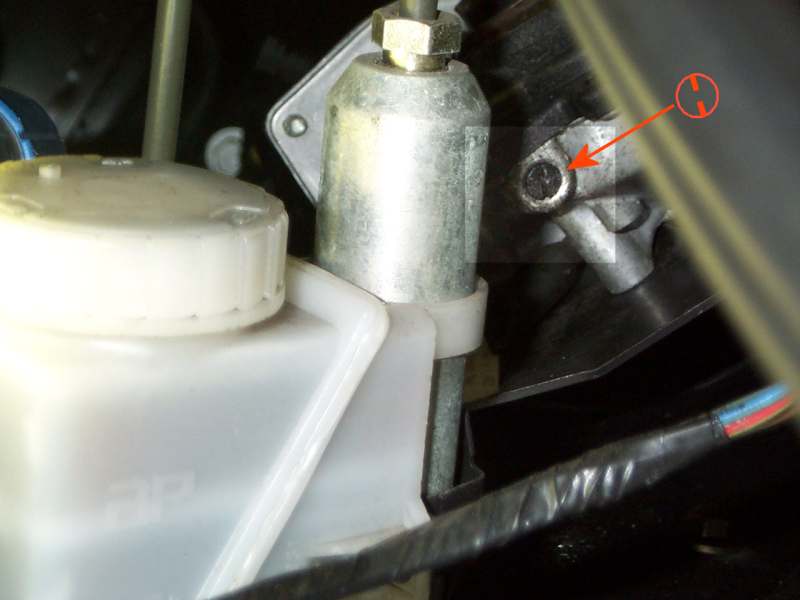
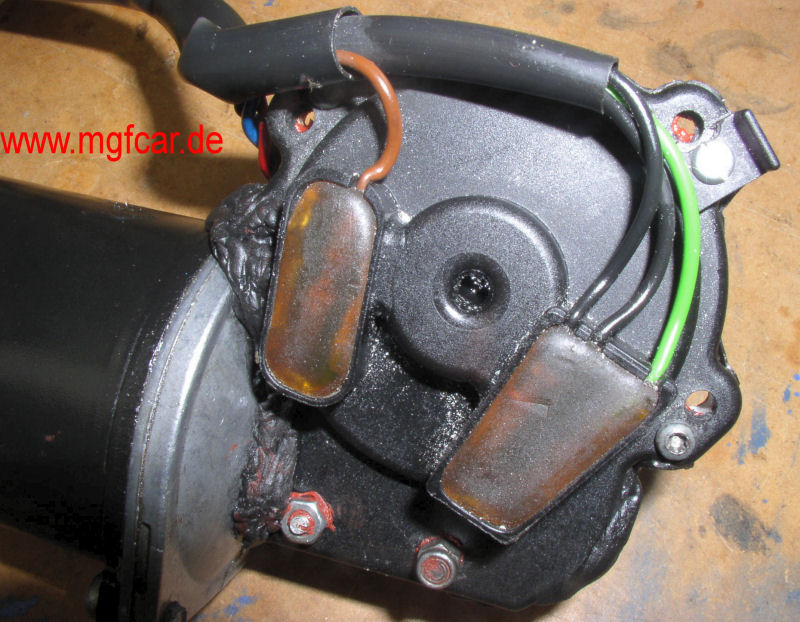
actually it's possible (fairly easy, even!) to either disconnect the linkage from the motor spindle or remove the whole wiper motor without removing the linkage or wiper arms. (Certainly on an Mk1 F RHD at least)

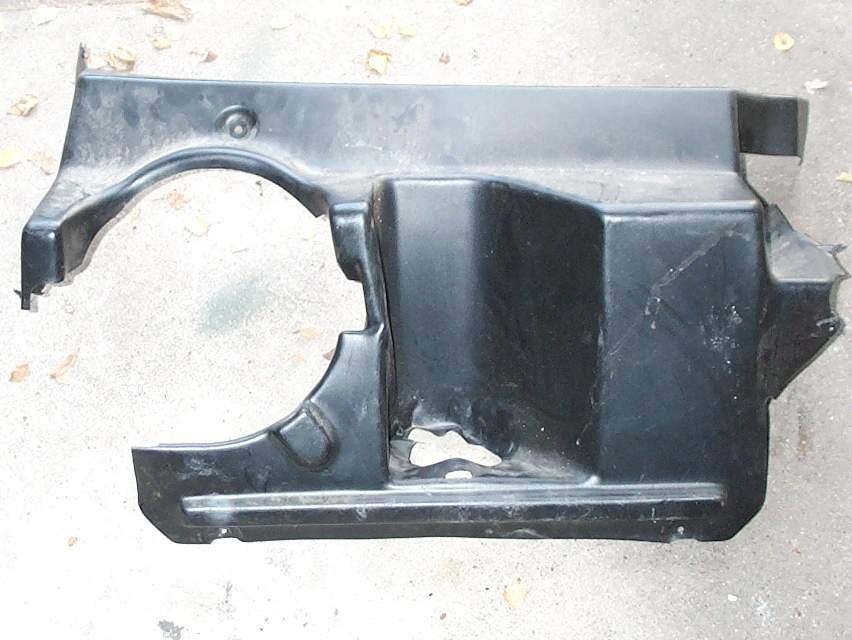
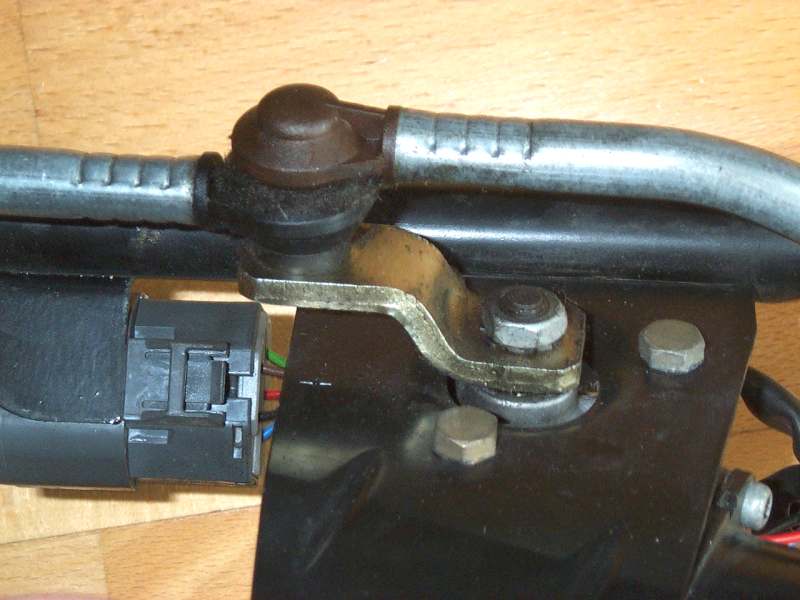
All that's required is to remove the big plastic cover which sits above the screenwash bottle, then use a 13mm flexible-head ratcheting spanner to undo the nut fastening the linkage to the motor spindle, and if required, undo the 3 motor mounting bolts with a 10mm flexible head ratcheting spanner.

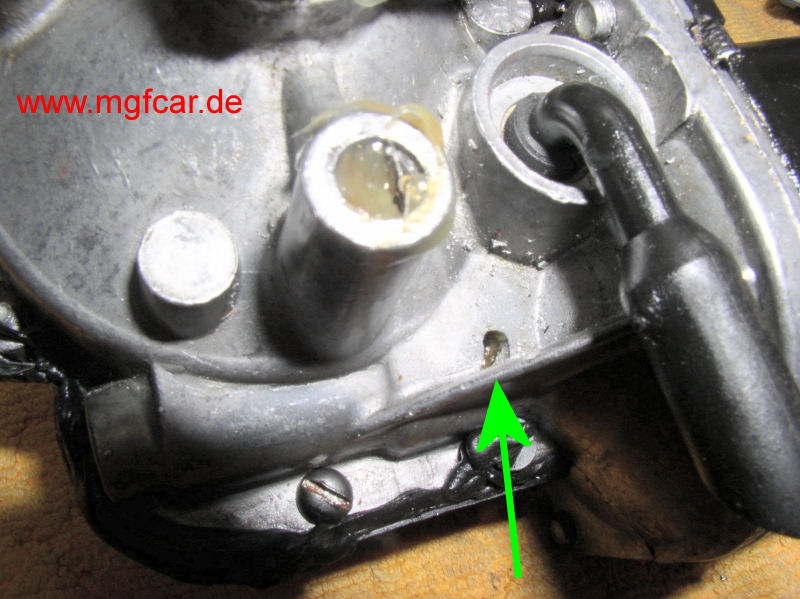
The only awkward thing is that you can't actually see the nut or heads of the bolts as they are behind the wiper motor and gearbox assembly but they are all accessible and fairly easy to locate by feel.
Hopefully that information might save someone a little bit of time...

or 
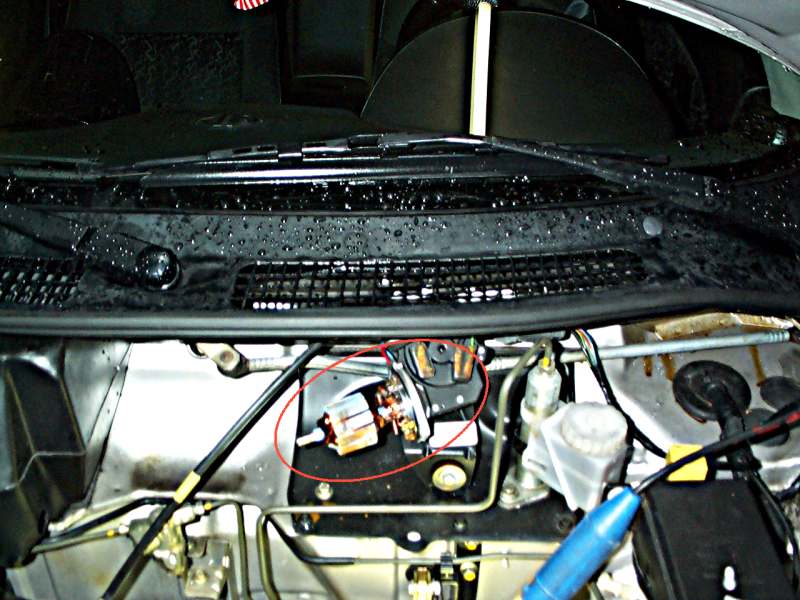
change the motor after taking out the whole wiper assy, as done by Bruce Caldwell:

You can remove the whole wiper unit to get the wiper motor out. I carefully removed the two bolts holding the clutch master cylinder to the bulkhead and allowed the clutch master cylinder to ease forward on its pipes. You can then just manage to get the whole unit out.

Neuer Motor mit kleinerem Stecker New design motor with small plug
 Frontraum MGF Linkslenker.
Schwarze Schutzhaube ausgeschnitten, für die Frontbox.
The bonnet of my MGF with cut black shredder.
Done to get space for the LHD front box.
 Getriebegehäuse des alten und neuen Motors.
Das ist nicht dicht zwischen Plastikteil und Gussteil.
Different looking gearbox case. 3 M6 bolts with 10mm head hold it at the bracket.
See the RH old one. The plastic cover is bended !
Did the water get in there ?

 Für den Umbau auf neuen Stecker schneidet man die Kabel durch und verbindet sie wieder. Conversion of the old plug to the newer MY2000 motor.
Not professional, but who cares. I cut the wires at different length to getting later a thin loom.. Slipped isolation hoses over the six wires and soldered them together.
 Fertig gelötet und abgedichtet. soldered and protected harness. Old plug converted to new design motor.

Beim Linkslenker den Motor ausbauen mit 10er und 13er Reng-/Gabelschlüssel How to remove the motor

Tools, 10mm and 13mm ring/fork spanner
Unbolt the front lower fixture to get ability of bending the bracket slight upwards while getting to the fixture bolts behind it.
Unbolt the 13mm head bold which holds the lever to the axle.
Unbolt the three 10mm head bolts and get the motor off
Back in and closed Do not move the wipers out of direction while you bolt all back.

some pics of the subject
   
Wischerarme LHD wiper arms
Frontraum Abdeckung
NIEMALS ohne diese Abdeckung das Auto im Regen stehen lassen.
In den Scvheibenwischermotor läuft dann Wasser rein und das überlebt der nicht.
LHD wiper assy cover.
NEVER drive without this cover, cause water ingress to the wiper motor will damage the motor
Rückansicht
Das gesamte Teil gibt es bei MG Rover unter TNr GNU7843 für stolze 200 EURO

top view on the assembly,
Part Number GNU7843 for 125 GBP

Draufsicht

front view

Achtung:
Die beiden Verbindungsstangen hat X-Part unter TNr Nr DKT000010
oder DKT000010SLP
jedoch für über 80 EURO

(...SLP heisst *Service Line Part*)

Montage

Notice:
The linkage bars with ball joint at the ends should be availiable at X-Part with
p/n DKT000010 or DKT000010SLP
(...SLP reads *Service Line Part*)
Instructions
.Ansicht Motor

on top Motor

Linke Seite

LH side

.Antriebsachse

wiper motor main lever
.  

Copied from the MG Cars BBS Archives. Protecting the motor:

From: Bruce Caldwell Northamptonshire United Kingdom on 11 October 2001 at 11:06:47 (UK time)
Tom,
Check out the light green wire at the plug and socket near the wiper motor. Also the brown/light green wire.
Also the wiper motors are prone to filling with water so release the screws holding the cylindrical body and carefully separate the casing from the motor. The casing holds the permanent magnets for the motor so they will be tricky to release. Empty the casing of any water and crud. Much of the crud (if any) will be ferrous so use something like plasticine to remove this from the magnets. You will have to chuck the plasticine afterwards! Then drill a small hole, say 2mm in the bottom of the casing at the bearing end so that any water in future can leak out. While you have the motor open check the soundness of the connections and wires inside. The self parking switch is not in the motor itself but in the gearbox part. You will see the wires going into it. The connections are encapsulated but you can dig them out if necessary.

Other connections to check will of course be the connections to the wiper stalk. Remove the covers to the column and check the connector has not come loose.
To do this open the under dash fusebox. Remove the three screws securing the bottom cover to the column and remove the top cover. You should then be able to see the connector.
Try the wiper stalk connectors first because that's easiest.
I've had all these problems!

Hope this helps
Bruce

My own useless attempt to get rid of Wiper Motor Noise ;-)

 
Noisy wining Wiper
Nach einem Werkstattbesuch im Oktober 2000. Die Leute hatten vergessen, die schwarze Frontraum Plastikabdeckung zu montieren und das Auto stand so 3 Wochen im Regen. At the dealer visit in October 2000 due to my cars crack noise troubles. These anones removed the black bonnet cover and the car stood in the rain for 3 weeks.
10
das schwarze Gehäuse des Motor abschrauben.
Zwei Torx Schrauben
Remove the black housing of the motor.
Two torx bolts
 
Ansicht des rostigen Rotors
Mit einem Tuch abtrocknen und mit WD40 den Rost lösen und enfernen. Nachher fein einfetten.
view on the rusty rotor
Dry with fabric and applied some WD40 and carefully grease later.
 
Rost und Wasser im Gehäuse. Das Wasser kann nicht ablaufen View to the rusty water inside the case. The water cannot drain.
 
Ein 2mm Loch in das Gehäuse unten bohren.
Vor dem Bohren einen Lappen reinstopfen, damit die Bohrspäne nicht am starken Magneten hängen bleiben.
Alles wieder zusammenbauen und hoffen, dass es jetz ruhig ist.
In meinem Fall war es zu spät. Es war auch vorn im Lager Wasser drin und ich besorgte mir einen neuen Motor.
Aber, seht hier unten, die Paul Liverton dann 2005 den Motor weiter demontierte und eine Reparaturmöglichkeit fand.

drill a 2mm hole careful in the housing.
Put a piece of fabric into the case before you drill to keeping of spans from the strong solenoids
Put all back carefully and hope the noise will have gone.
I need to admit.
This did NOT work. Finally I had to get a new motor.
(Lack of knowledge about the repair option found by Paul Liverton. See below.

 
Hier die Schraube zur Justage des Rotorspiels. that bolt is for adjusting the gear play of the rotor.

Main cause for failing Motor??

  Ein Grund warum er absäuft One of the reason, why the motors gets water ingress
Die bescheuerte Montagelage des Wischermotors beim MGF.
Der Wasserablauf liegt oberhalb des Lagers. Na toll.
The funny mad installation of the wiper assy at the MGF and wrong located water drain nozzle. The level of the nozzle is above the bearing ...
The picture shows the aluminum case with removed ball bearing.
It's a standard 22x8x8 mm ball bearing.

Wiper Motor Repair


picture courtesy midimoog from Korea

Ein paar Fotos von Paul von seiner Reparatur des Wischermotors mit Getriebe.

Die Geräuschquelle war eindeutiog das Kugellager im Getriebegehäuse. Rost rundum das Lager
Das Lager ist ein Standard Schulterlager mit den Abmessungen
Da 22mm
Di 8mm
H 7mm
Lager Nummer 608 ( DIN 625-1 ) ... thanks Markus :)

As I advised, here is the first of a series of pics of the repair to the F wiper motor/gearbox.

Paul Liverton 2005.

The noise source was due to the ballrace which supports the motor drive shaft. There was clear evidence of rust in and around this bearing.
The bearing is a shrouded ball race,
22mm outside diameter,
8mm bore and 7mm thick.
Paul bought one from stock in a bearing shop for just under £6.
Germans see for bearing number 608 (thanks Markus for looking up the number)
Paul Liverton Rotor des Motors entfernt.
Bürste (3x) und Federn abnehmen, während der Rotor vorsichtig herausgedreht wird.
Die Platine des Bürstenhalters wird mit zwei Nietungen gehalten, die ausgebohrt werden müssen.
pic 113
Motor rotor removed. Brushes (3) and springs removed when rotor withdrawn from the bearing. The support plate for the brush boxes are retained by 2 rivets which were drilled out.
Paul Liverton Blick auf das Schneckenrad und den Schwenkarm die auf der Welle befestigt sind. Die konische Zahnung am Wellenende für den Reibschluß mit dem Schwenkarm beachten. pic 117
View of the worm wheel attached to its shaft and the cranked arm. Note the tapered spline at the drive end.
Gesamtansicht des Rotors pic 120
Close up of the motor armature.
Paul Liverton Detailansicht der Schnecke, mit Sprengring (Nute beachten) und Plastikstellschraube zur Justage des Rotorspiels. Pic 120 (again)
Note the groove for the Circlip.
pic 125
Armature cloe up. Note the Circlip groove and the hollow "plastic" grub screw used to adjust end float of the shaft.
Paul Liverton
Paul Liverton
Blick in das Getriebegehäuse mit dem Kugellager.
Die zwei ausgebohrten Niete haben die Bürstenplatte gehalten.
Ziemlich viel Korrosion rund um das Lager.
pics 131 and 132
Looking into the ball bearing housing. Note the two rivets either side of the bearing after drilling out and removal of the back plate. Note corrosion on and around bearing.
Paul Liverton
Paul Liverton
Lager aus dem Gehäuse herausgedrückt. Abstandsring beachten. Weiß der Himmel, wozu der da ist. Vielleicht um gegen Schmutz abzudichten.
Paul hat ein gerade zufällig passendes Torxbit zum Ausdrücken des Lagers benutzt.
pics 141 & 145
Bearing removed from housing. Note retaining ring, sleeve ( purpose unknown- could be to exclude crud) and the Torx bit used as a removal tool - just the right size!!
Paul Liverton
Antriebswelle wieder zusammengebaut.
Die Zahnung auf der Welle beachten, sowie die Zahnscheiben und 13mm Mutter.
Pics 150 & 151
Drive shaft reassembled, note the TAPERED spline,
crinkle antivibration washer and securing nut. This is
13mm A/F.
Paul Liverton Mit der Gummidichtung sehr vorsichtig umgehen.
Paul benutzte dauerelastischen Dichtungskitt bei der Endmontage.
pic 154
Take care with the rubber gasket. I used a non
hardening sealant when reassembling.
Paul Liverton Ebenso vorsichtig mit dem Gummiring umgehen. Paul nahm hier Fett zum Einbau. pic 156
Take care of the O ring. I used mineral jelly
Paul Liverton Getriebegehäusedeckel mit den originalen 3 Torx Schrauben.
Die bei der Demontage ausgebohrten Nietungen hat er mit M3 Schrauben und Muttern ersetzt.
pic 160
Gearbox cover secured with the original 3 Torx set
screws . The 5 rivets drilled out when stripping were
replaced by 3 nuts and bolts approximatly 3mm.
Paul Liverton Paul bohrte ein 3mm Abflußloch an die unterste Stelle im Gehäuse.
[Der wichtigste Schritt, um dem Motor ein langes weiteres Leben zu gewähren].
pic 161
I drilled a 3mm drain hole in the lowest face of the casing.

[comment by Dieter:
This is most importent, cause the original drain nozzle is placed in wrong height at the MGF installation of this Motor]
All pictures courtesy
Paul Liverton.
May, 2005
   

Substitute from other car makes like VW Audi Seat Skoda from the late 90th

for replacement a similar BOSCH wiper motor can get converted
Audi (8L), Golf III (1H), Skoda, Seat
6X0 955 119 — VW / SEAT
1C0 955 119 — VW / AUDI / SKODA
1J0 955 119 — VW / AUDI / SKODA
1H0 955 119 — VW / AUDI / SKODA

1C1 955 113 B — VW / AUDI / SKODA
1C2 955 113 B — VW / AUDI / SKODA
1H1955113A — VW / AUDI / SKODA / SEAT
1L0 955 119 — SEAT
1L0 955 023 — SEAT
1L0 955 023 A — SEAT
1H1 955 113 — VW / AUDI

Instructions and part numbers

original


Sample Motor with marked connections
Take care and measure the blue and red one cause they are swapped at some of the motors


screen washer pump

Waschwasserbehälter und 12V Pumpe

TNr DMC100380

screen washer can and 12V screen washer pump
p/n DMC100380
Die Pumpe kann leicht von Hand herausgezogen und gereinigt werden. the pump can be pulled out easy .
Should be cleaned if muddy water has got used.

back or to my MGF home site www.MGFcar.de

© 2002 - 2023 Dieter Koennecke

MG Car Club