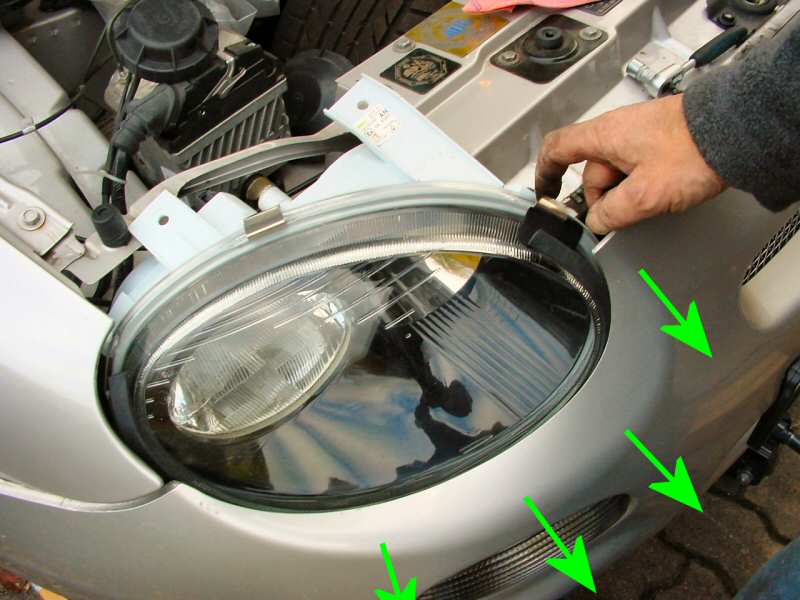
Dann kann der Stoßfänger dranbleiben. Die Frontscheinwerfer gehen auch so raus:
- vorn hochbocken
- Lenkradschloß frei stellen, (Vorderräder schwenkbar)
- 6 Kreuzschlitzschrauben der Stoßstange vorn unter der Haubenkante
rausdrehen
- Radhausverkleidung lösen und nach aussen klappen (2 Kreuzschlitzschrauben
und ein bischen rohe Gewalt)
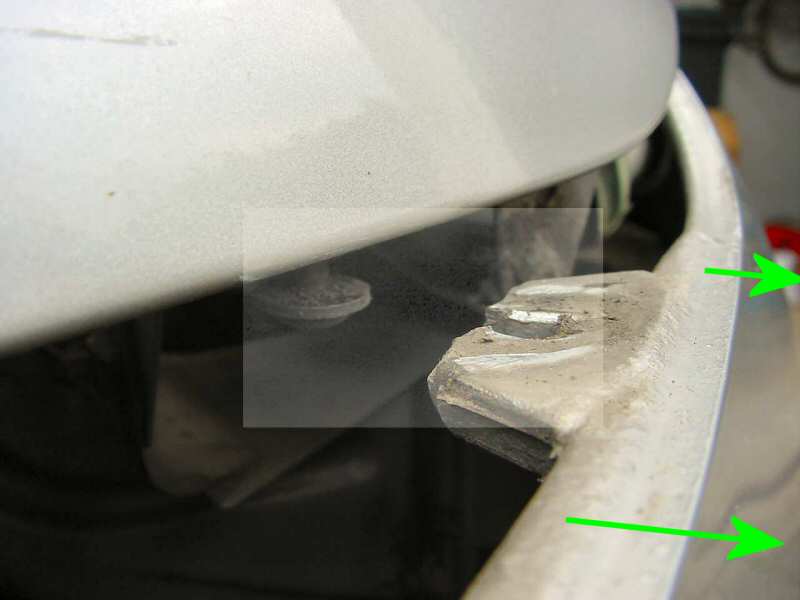
- vordere Schraube vom Kotflügel/Stossfänger lösen, nicht
abschrauben
- radhausseitige Schraube rausdrehen
- Kotflügelecke nach aussen schieben
- 2 Schrauben des Scheinwerfers oben rausdrehen (10er Nuss)
Bis hierhin alles wie gehabt, siehe auch Bilder bei Mani.
Nun kommts....
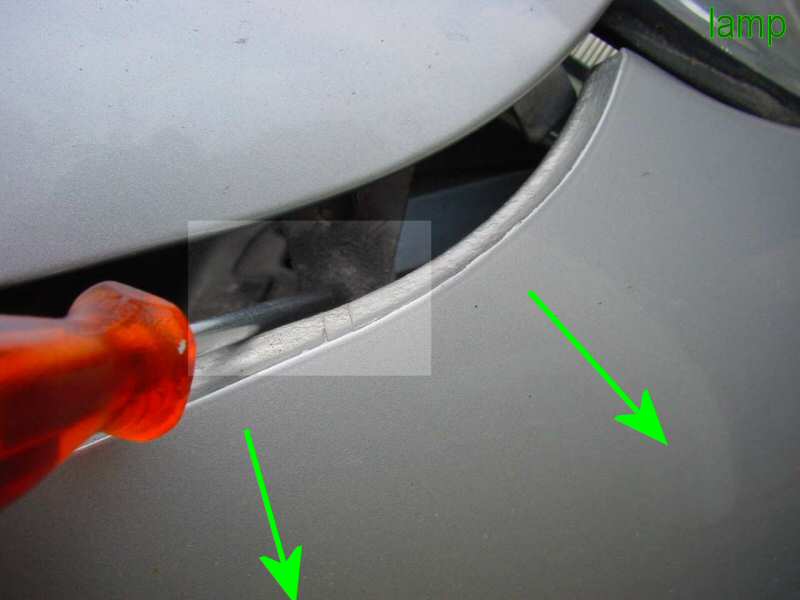
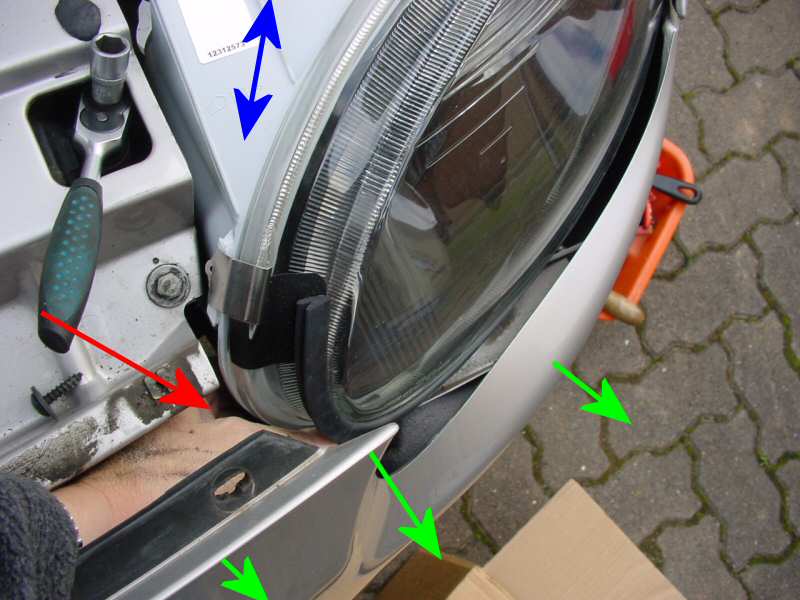
Die seitliche Schraube der Lampe erreicht man, wenn man die Stoßstange
dort nach unten biegt.
- ... rausdrehen
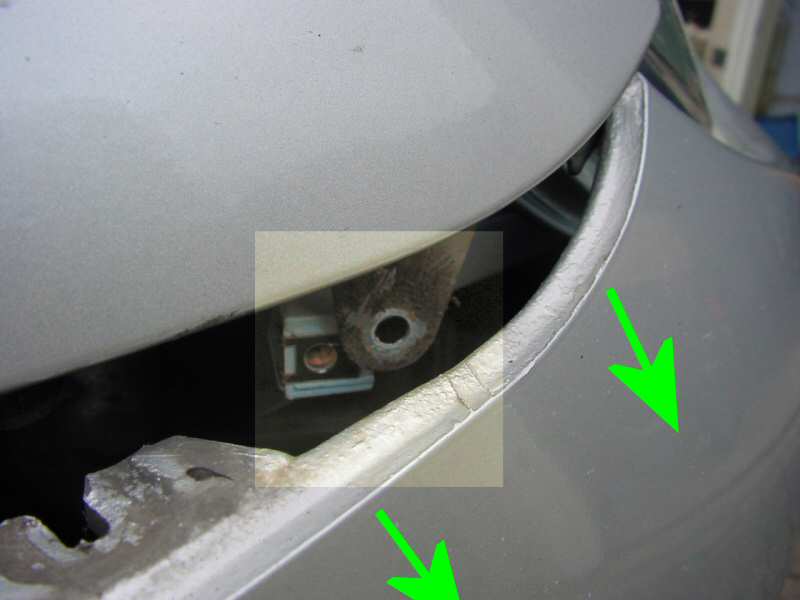
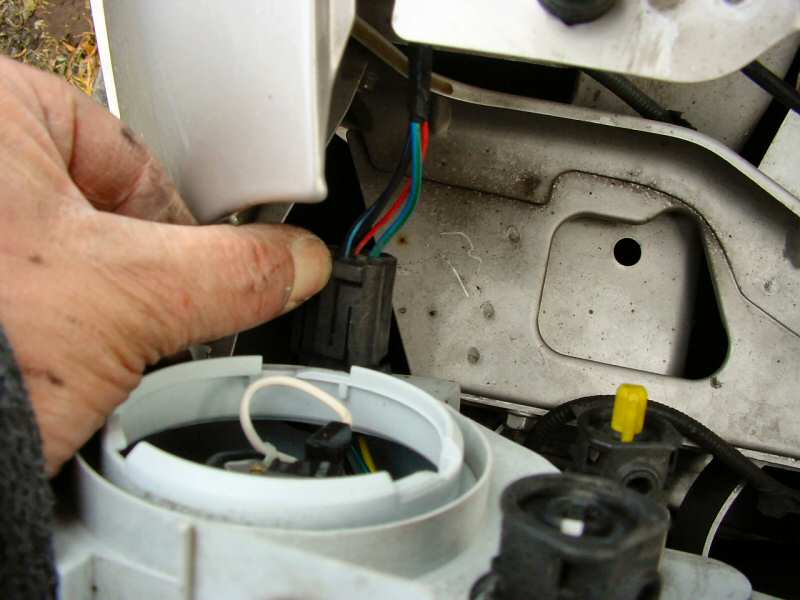
- die zwei schwarzen Deckel des Scheinwerfers entfernen (wegen Platzbedarf)'
- den Scheinwerfer leicht anheben und den Lampenstecker entfernen (hinten
auf den Bügel drücken, ...Rastung)
Nun vorsichtug rauswurschteln.
Dazu den Stossfänger nach vorn unten biegen.
Auf die Plastikwinkel achten und auf die Lampendichtung hinter dem Kotflügel.
So dreht man den Scheinwerfer da raus.
May
be you know, I'm a leisure guy. So why remove the bumper, just to get
new headlights in ?
See here, the bumper can stay on. The headlights could get changed even
with installed bumper.
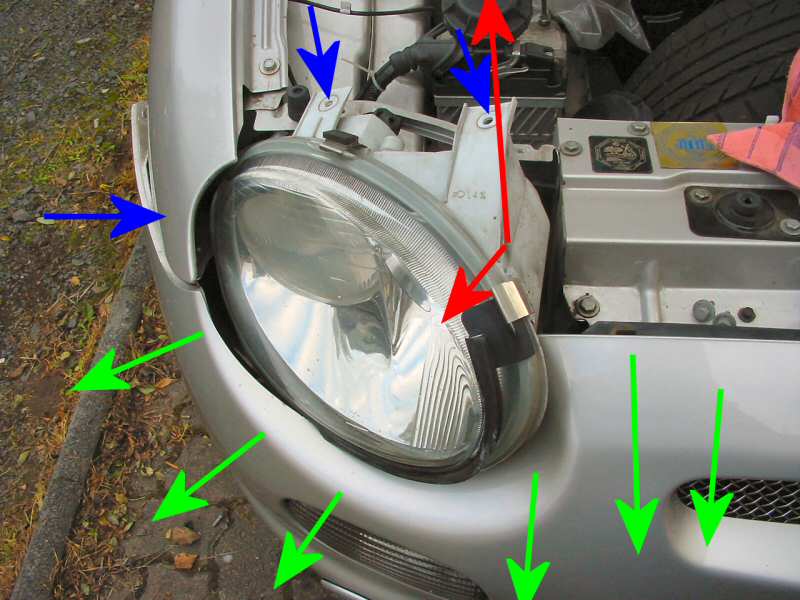
- raise the car at the front
- keep the ignition key in and hold the steering unlocked. So you can
move wheels from outside for easier access to the wheel house.
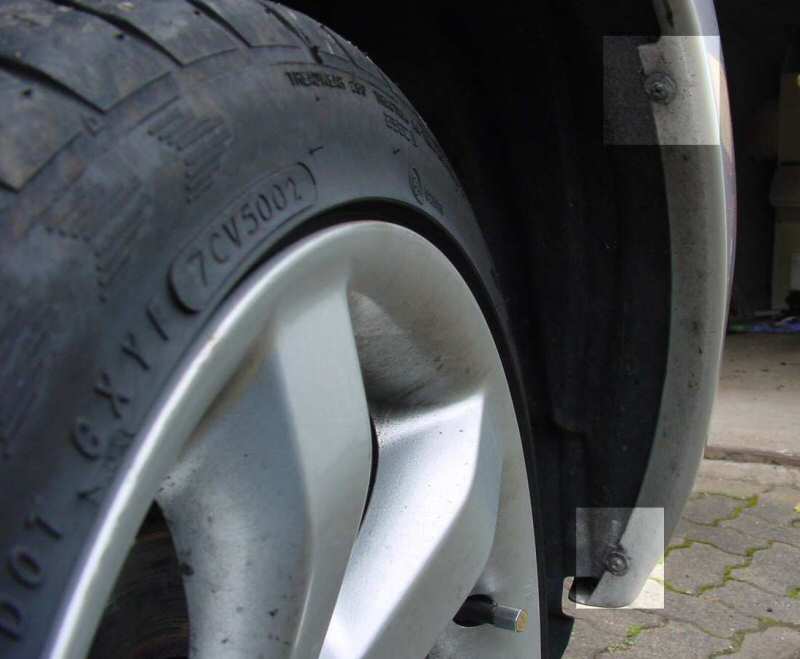
- Remove the upper 6 bolts that hold the bumper in front of the radiator
bracket.
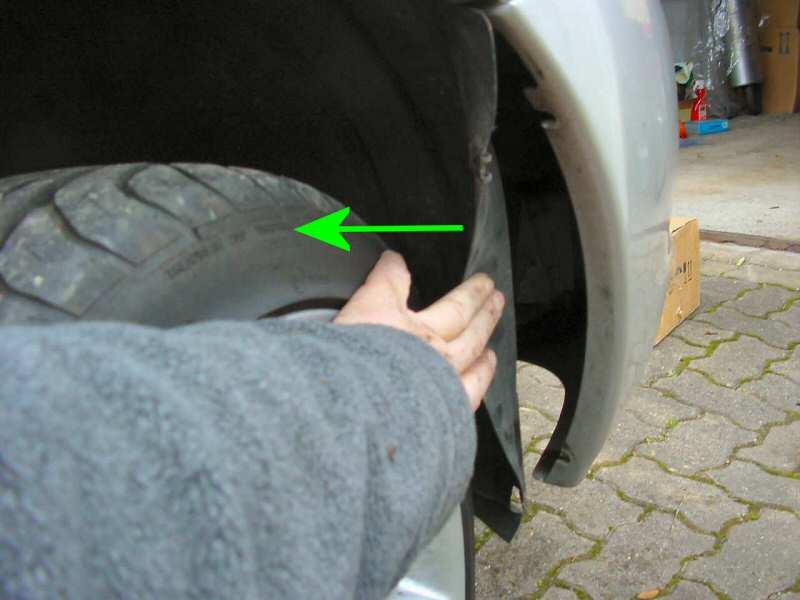
- Loosen the wheel arch liner as shown (2 bolts) and swap it to outwards
to get access to the upper hidden fixture bolt for the bumper.
- loosen, but do not remove the hidden bumper bolt and move the bumper
tip outwards to locate the hidden lower, outer head lamp fixture bolt.
- unbolt this cross-head screw and the upper both screws of the headlight
(blue mark on the image with 10mm spanner.
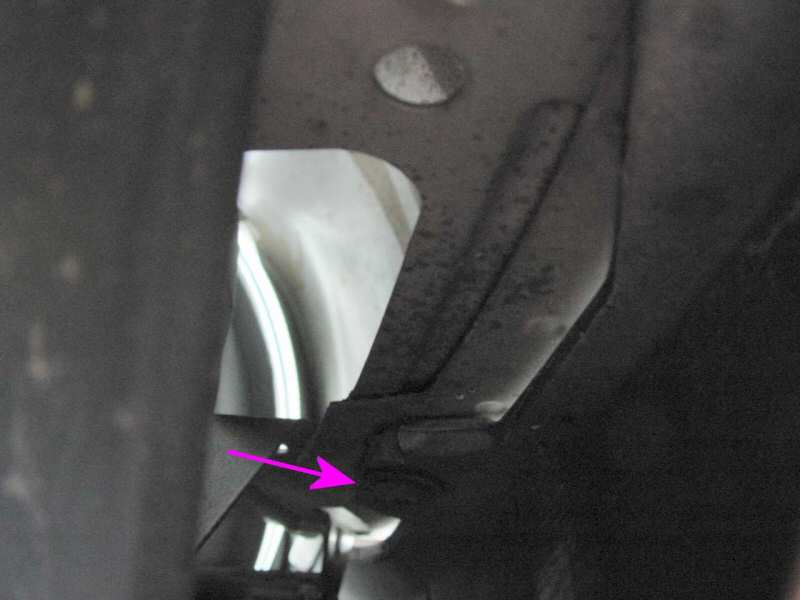
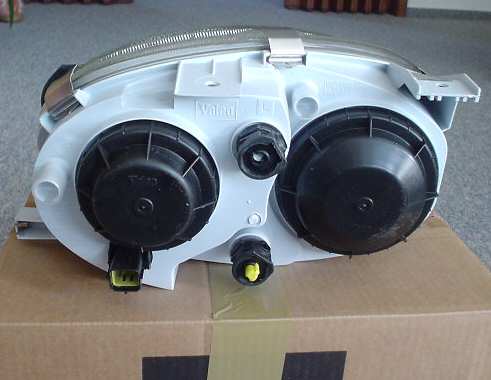
- remove the both black bulb covers and the bulb connectors .
- now carefully raise and turn foreward the headlight, while pulling the
bumper to the front of the car and downwards (green and red arrows on
the image.)
- notice no force applying on the thin plastic brackets and notice the
gasket at the front of the headlight.
Apply some grease to the three headlamp fixture thread holes before you
go on.


Den neuen *rückwärts*
wieder rein.
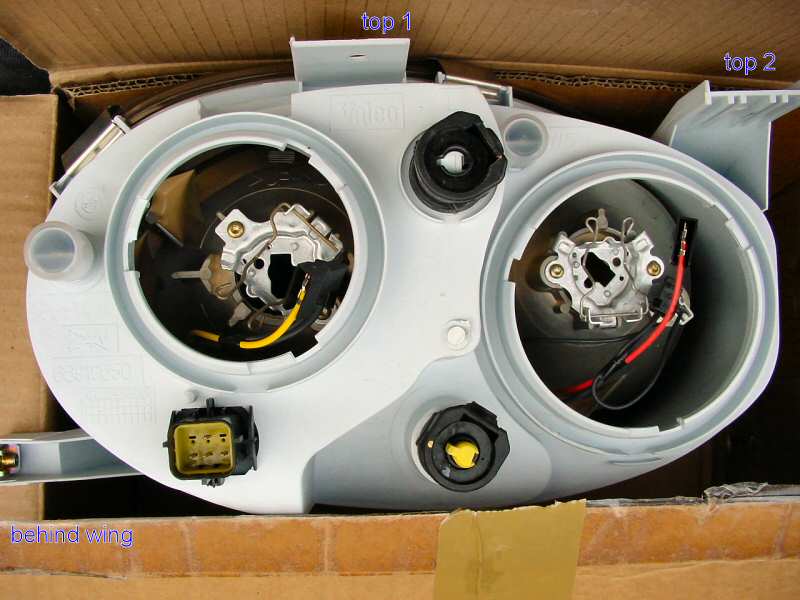
- Stecker reinstecken.
- die untere Rastnase *einführen* und in die Gümmitülle
reinprömmeln. (Dabei wiederum auf die Dichtung am Kotflügel
achten. Da ist Druck drauf.
- dann die seitliche Schraube. (Mit einer Hand den Befestigungsstab hochdrücken
(auf Dichtung am Kotflügel achten) und mit der anderen Hand die Schraube
reindrehen. *Verschraubung vorher fetten, wegen Rost*
- Nun die zwei oberen Schrauben mit 10er Nuss wieder reindrehen.
Eine Seite fertig, das Gleiche nochmal auf der anderen Seite.
Wenn auch fertig, dann den Stossfänger wieder sauber einpassen (Dichtung
der Lampen)
- 6 Kreuzschlitz oben rein.
- je zwei versteckte Kotflügel-Stossfängerschrauben wieder rein
(Übergang beachten)
- Radhausverkeidung wieder eindrücken.
- Je zwei Radhausschrauben wieder reindrehen.
- Die 4 Deckel der Scheinwerfer wieder anschrauben.
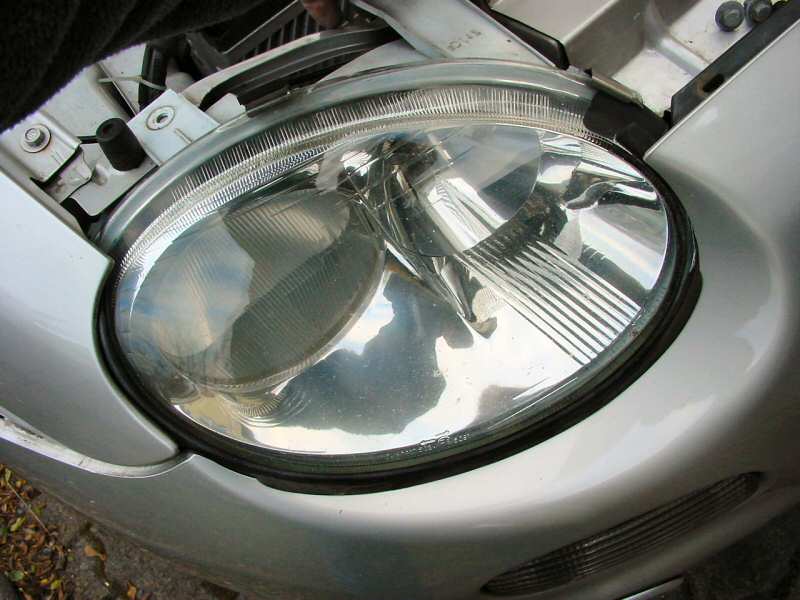
Fertig
http://www.mgfcar.de/hef_mg/2004_nov_t.jpg
Und ???

Check the location of the lower notch at the headlight and how the outer fixture bracket needs to get back in place.
Then swap it in while pulling again the bumper to front outwards.
Check:
Gasket must be behind the bumper edge
The lower notch must be in place, and the outer bracket must be near the fixture thread hole.
- put back the outer cross head bolt and give some pressure by hand to the head light housing while fiddling in the bolt.
- put back th both upper screws
Dual Metallising Limited,
Unit 12/14 The Business Centre,
James Road, Tyseley,
Birmingham, B11 2BA
Telephone 0121 708 2748